Behind some of my photos taken in 2015
In this post I take a look back at some of the photos I took in 2015 and explain how and why I created them.
1. Ripley Castle Waterfall
This is a spot I visit a couple of times each year. The waterfall can be accessed by a short walk down a path which starts by the castle in Ripley North Yorkshire.
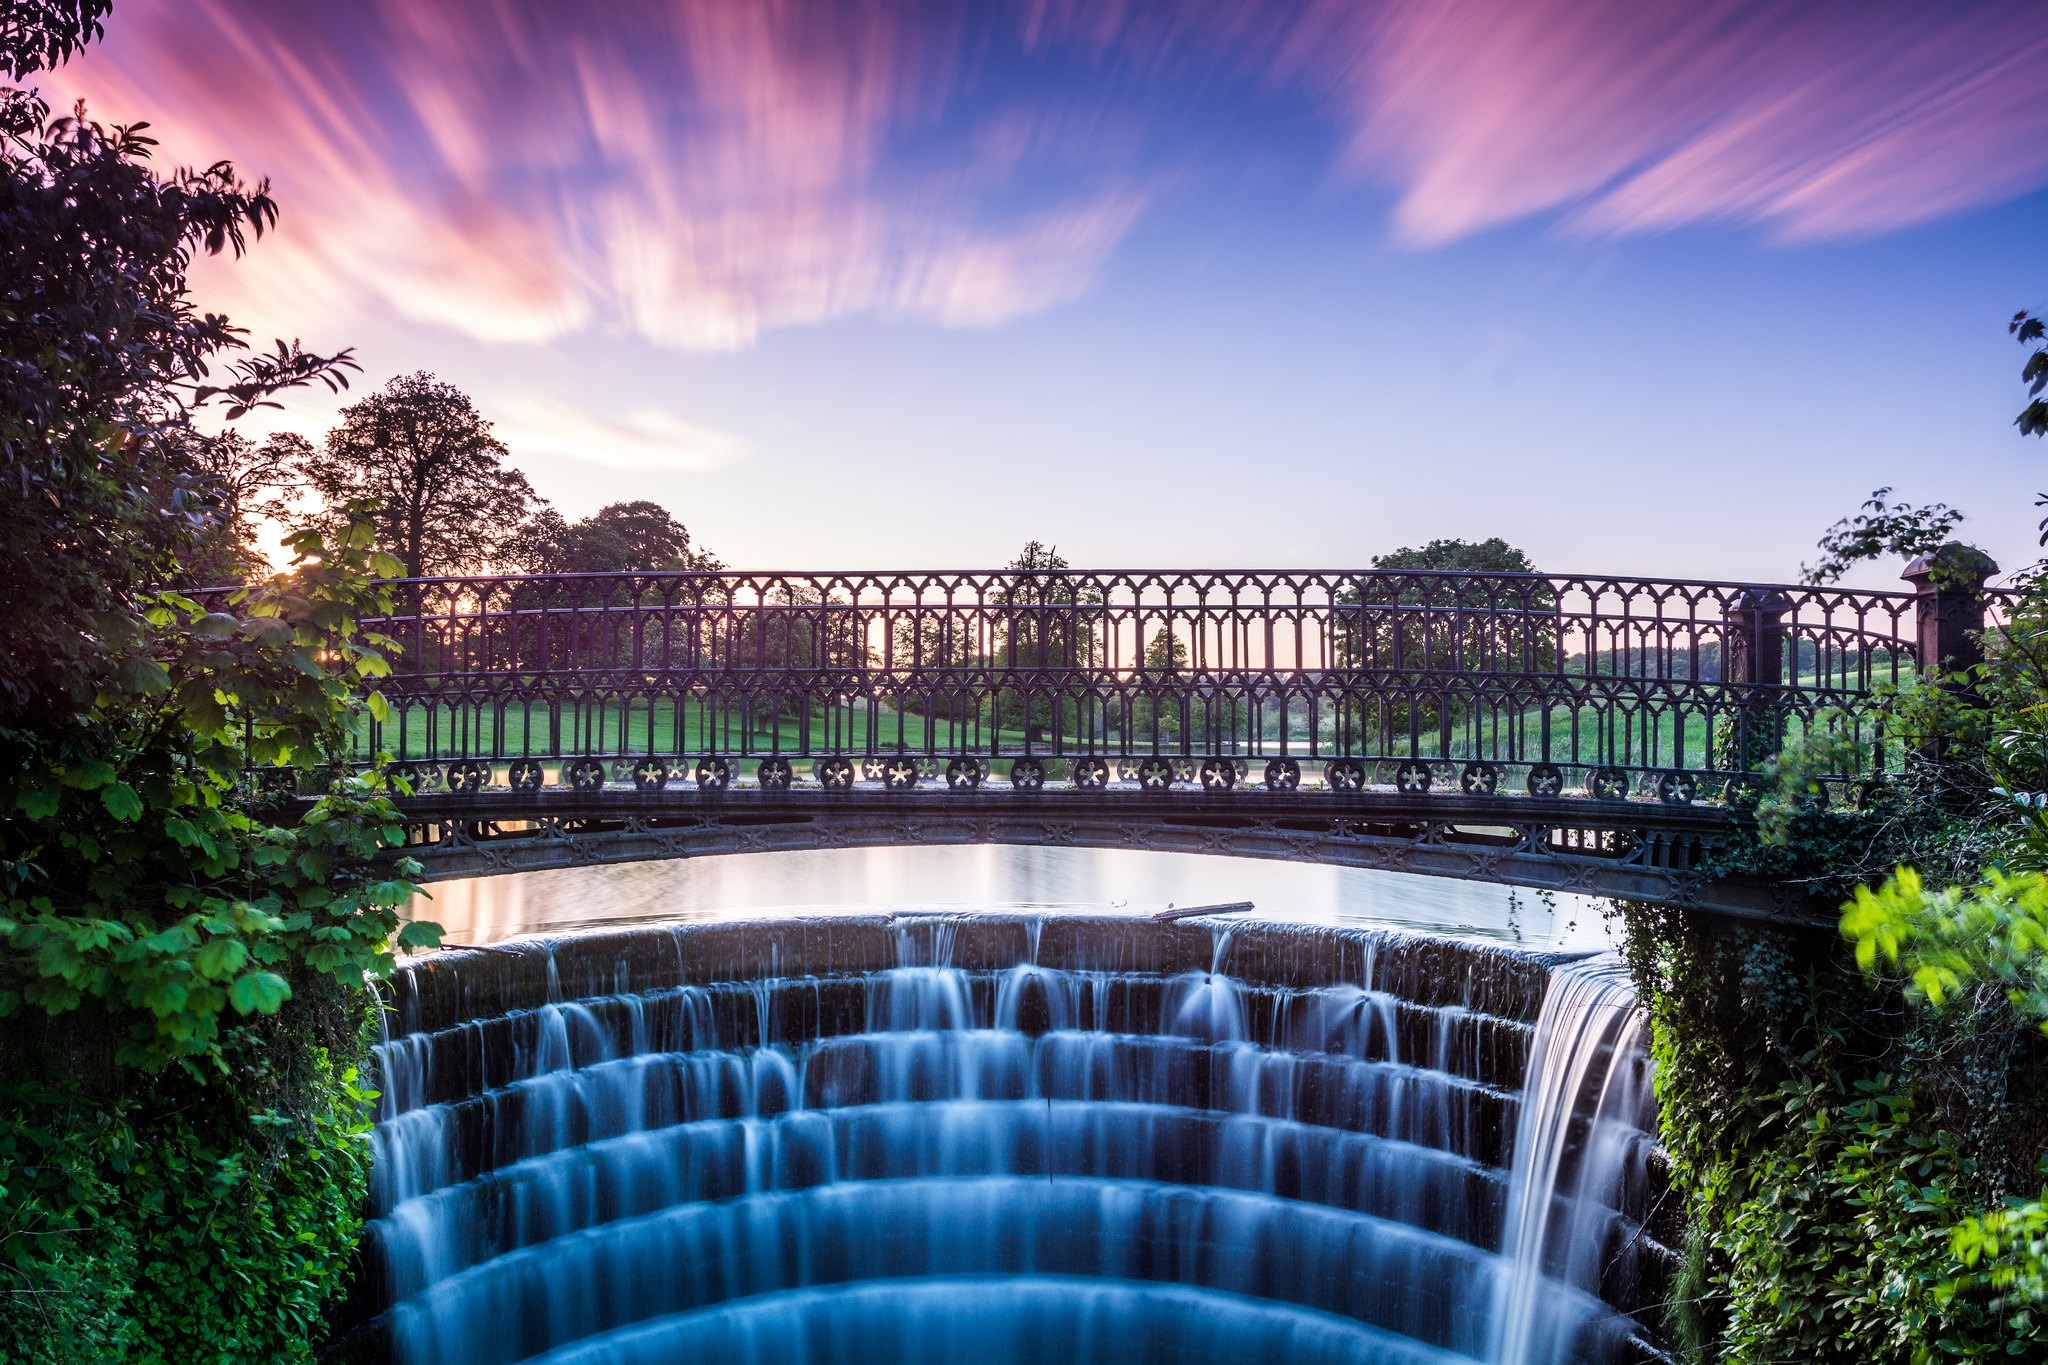
Ripley Castle Waterfall
There were a few clouds floating about in the sky and the flowing water was naturally begging for a long exposure. The one problem I was having that day; was with midges! They were everywhere with it being a hot evening in May. I opted for a long exposure to capture the movement of the clouds, the flowing of the water and to blur out those midges.
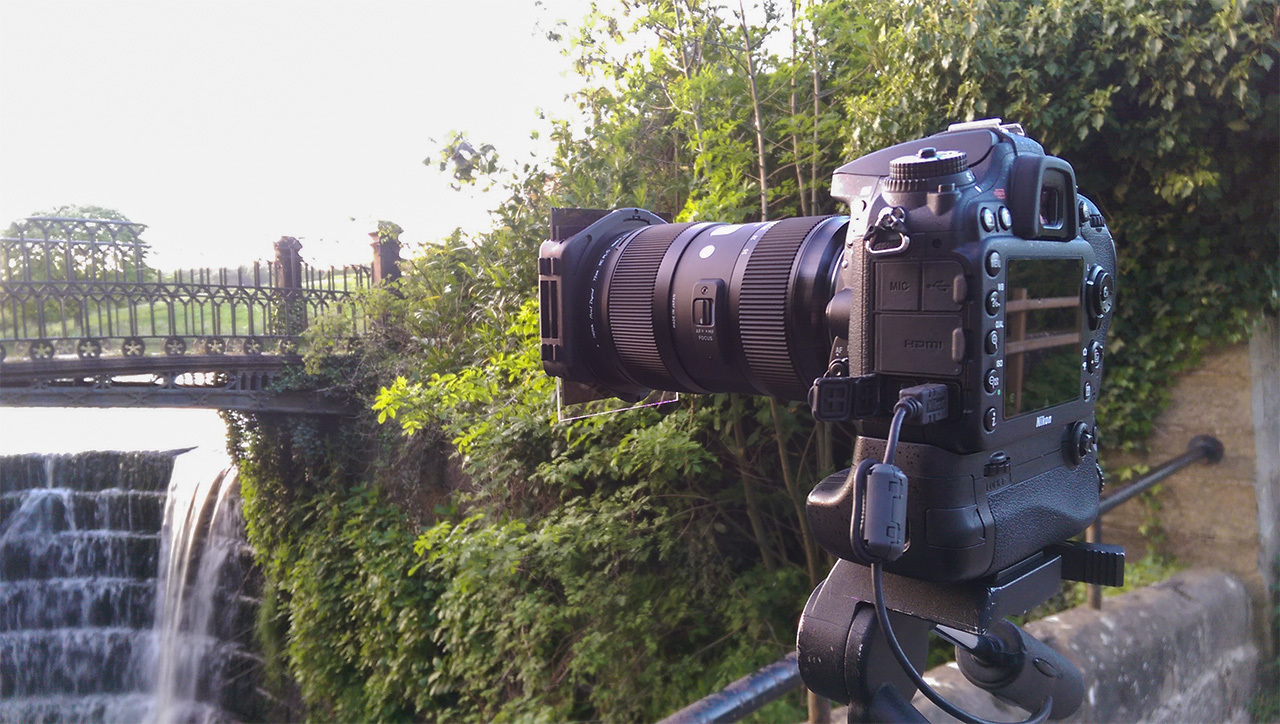
Camera: Nikon D7100 | Lens: Sigma 18-35mm 1.8 HSM Art
To achieve the 70 second exposure; I had my aperture set to f/8. I also used a circular/threaded ND16 filter which gives you four stops of light reduction, along with an ND8 square filter which gives an additional three stops reduction. I used an ND4 grad to help expose for the sky. To help boost the contrast and lower the amount of reflections in the water I also used a circular polarizer filter.
I can get a little carried away with my filters sometimes, but this was one of those shots where I think they're necessary to achieve this kind of look.
I always use a remote shutter release when taking long exposure to prevent the camera from shaking. I processed the RAW image from the camera with Lightroom 6.
2. Lake Gormire - Sutton Bank
Sutton Bank in North Yorkshire is home to some incredible views overlooking the vale of York. In fact it has been voted one of the best views in Yorkshire. I visited a few times this year, all of which failed to disappoint.

Lake Gormire - Sutton Bank, North Yorkshire
On my last visit in September I had one shot in mind which I wanted to take badly. There are a few really good shots of Lake Gormire on the web taken from the top of the cliff at Sutton Bank. I really wanted to take my own and I had the perfect spot in mind. On arriving to the spot I noticed a giant tripod, a camera and a photographer sat perched on the edge of the cliff. I went over and had a chat to see if he was planning on staying for long and to see if I could get somewhere close without ruining his shots. I had a chat with this guy who turned out to be a very friendly photographer called Karl Holtby, who was actually testing out a camera for Sigma at the time! He's a great landscape photographer who I would recommend you check out.
Anyhow I digress, I just about managed to get on the edge of the cliff with my tripod.
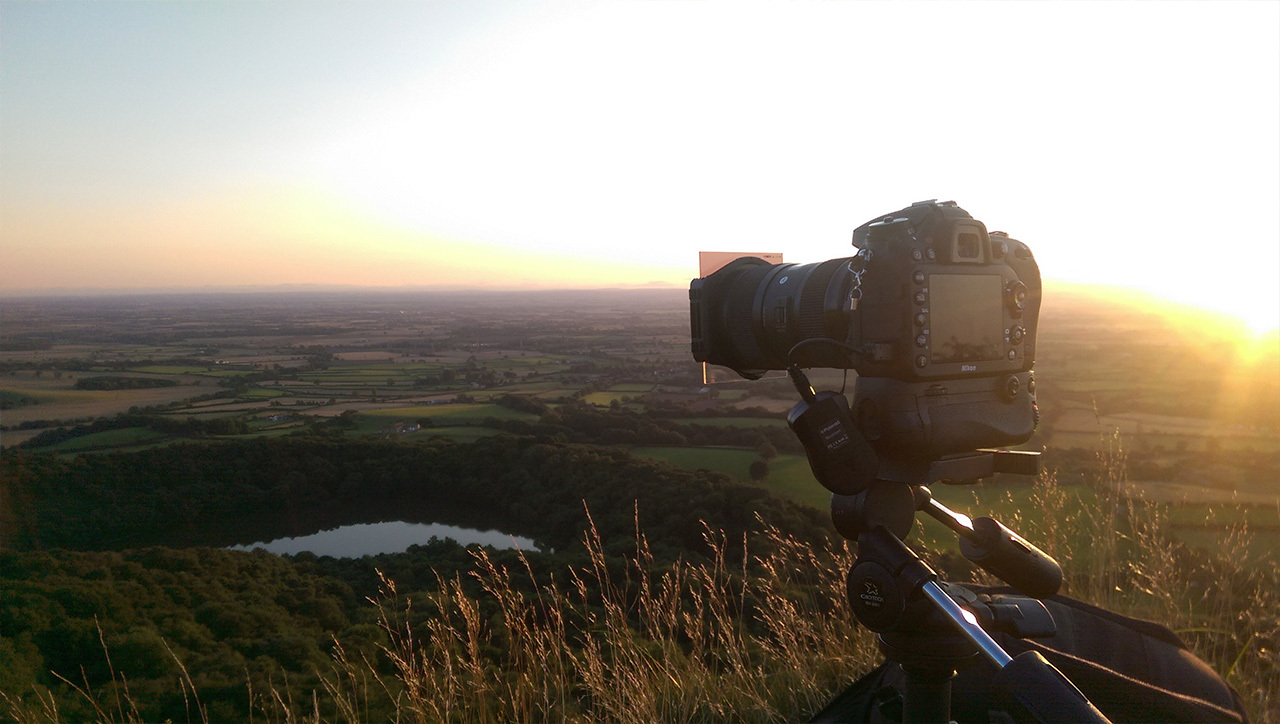
Camera: Nikon D7100 | Lens: Sigma 18-35mm 1.8 HSM Art
The sun was setting to the right and for a few minutes the cliffs became illuminated with some really nice light. I was hoping for a few clouds to add a bit more drama to the scene but unfortunately the sky was spotless. I used an ND4 grad and a circular polarizer filter to help expose the sky and to boost the contrast.
I zoomed into the scene slightly with my 18-35mm to 22mm to fill the frame and to focus more on the lake. I used an aperture of f/8 with a shutter speed of 1/5s at ISO 200.
I used a wireless remote shutter release so I wasn't knocking my slightly unstable tripod. The tripod was on some pretty bouncy grass so I had to anchor it down with my bag but fortunately it held up for the shot.
There was a lot of dynamic range in the shot and I used Lightroom 6 to adjust the shadows and highlights.
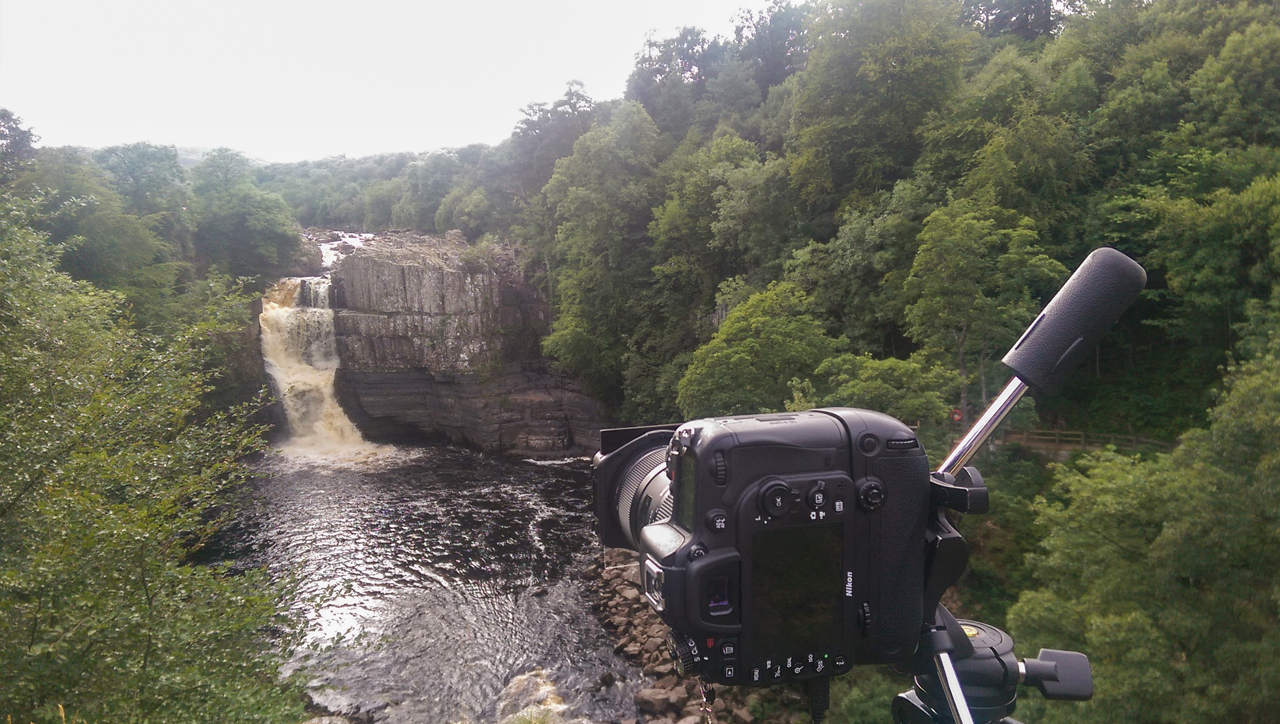
3. High Force Waterfall
Standing at 22 meters, High Force is one of the tallest waterfalls in the UK. The waterfall is situated on the River Tees in County Durham and is pretty easy to access by a short, but steep walk from the car park.
I visited in August and the weather was pretty overcast but luckily I managed to get a few shots with a break in the cloud which gave me a bit of sunlight.
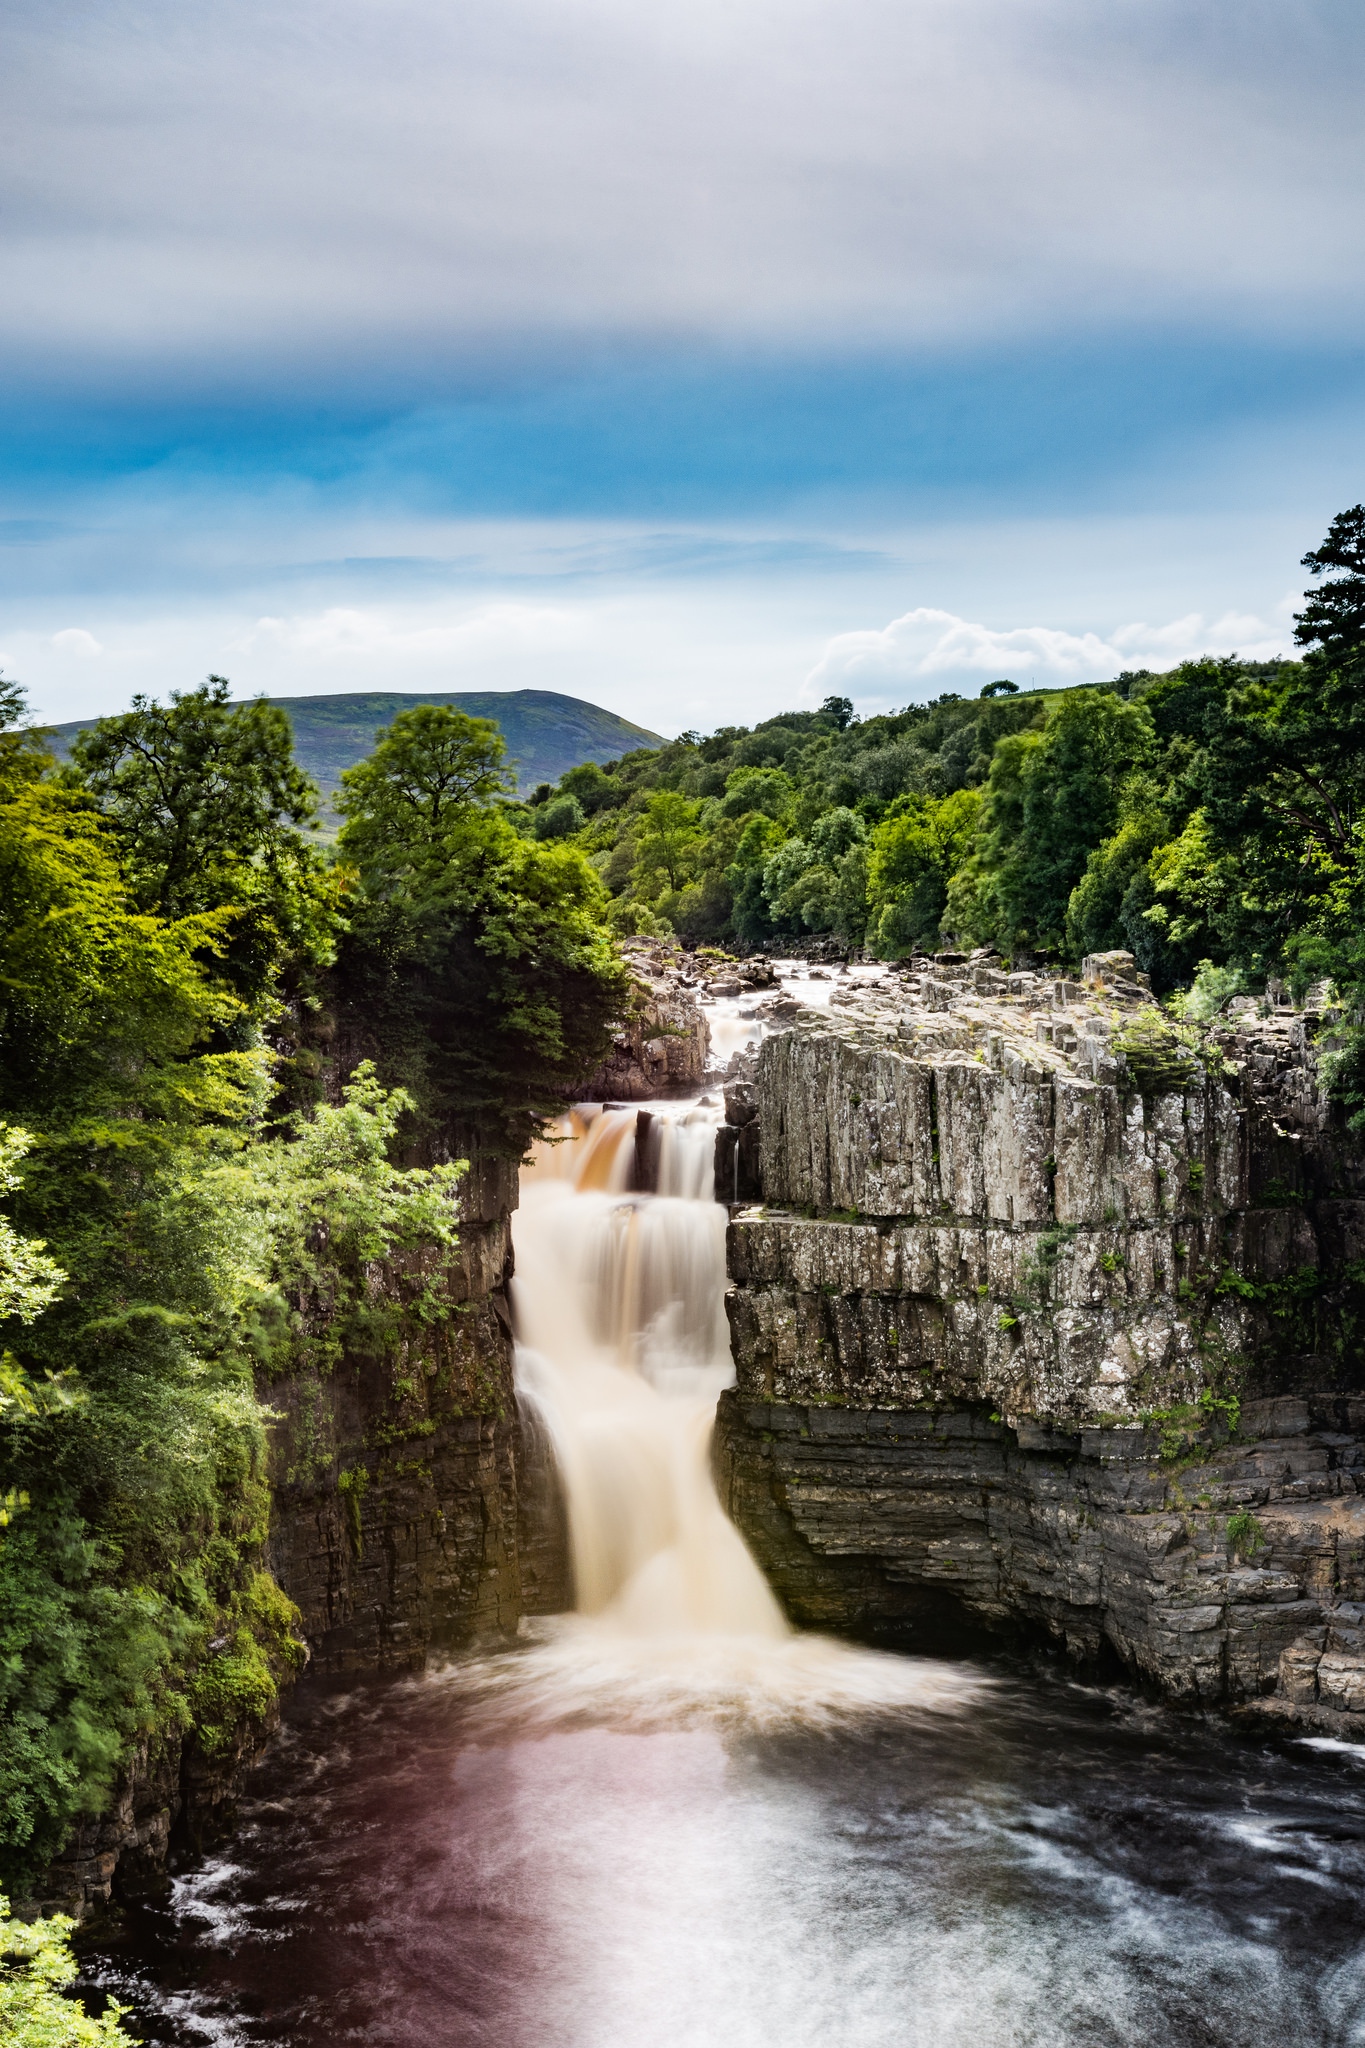
High Force Waterfall - County Durham
I opted to take this shot in portrait as I really wanted to show the shear height and power of the waterfall. I had some trouble with the trees sticking out from the left hand side of the waterfall so I had to set my tripod up right on the edge of a cliff.
Camera: Nikon D7100 | Lens: Sigma 18-35mm 1.8 HSM Art
As with all of my shots featuring flowing water, I usually opt for a long exposure. I used a circular polarizer, ND16 and an ND8 graduated filter to help boost the contrast and to help expose for the sky. Because of the significant contrast between the bright scene above the waterfall and the dark shadows below it, I decided to bracket the shot. I ended up with a 20 second and a 1.3 second exposure which I merged in post with Lightroom.
4. Grimwith Reservoir - Perseids Meteor Shower
The Perseids meteor shower is one of the best showers each year. You can see the meteors, or shooting stars as they're commonly called throughout August. In 2015 the shower peaked on the 12th and it's generally easier to see them in the early hours of the morning. This year me and my friend Jack decided to head out with our cameras to Grimwith Reservoir. We chose this spot because it's quite far away from any built up areas so there's little light pollution which is perfect for astrophotography.
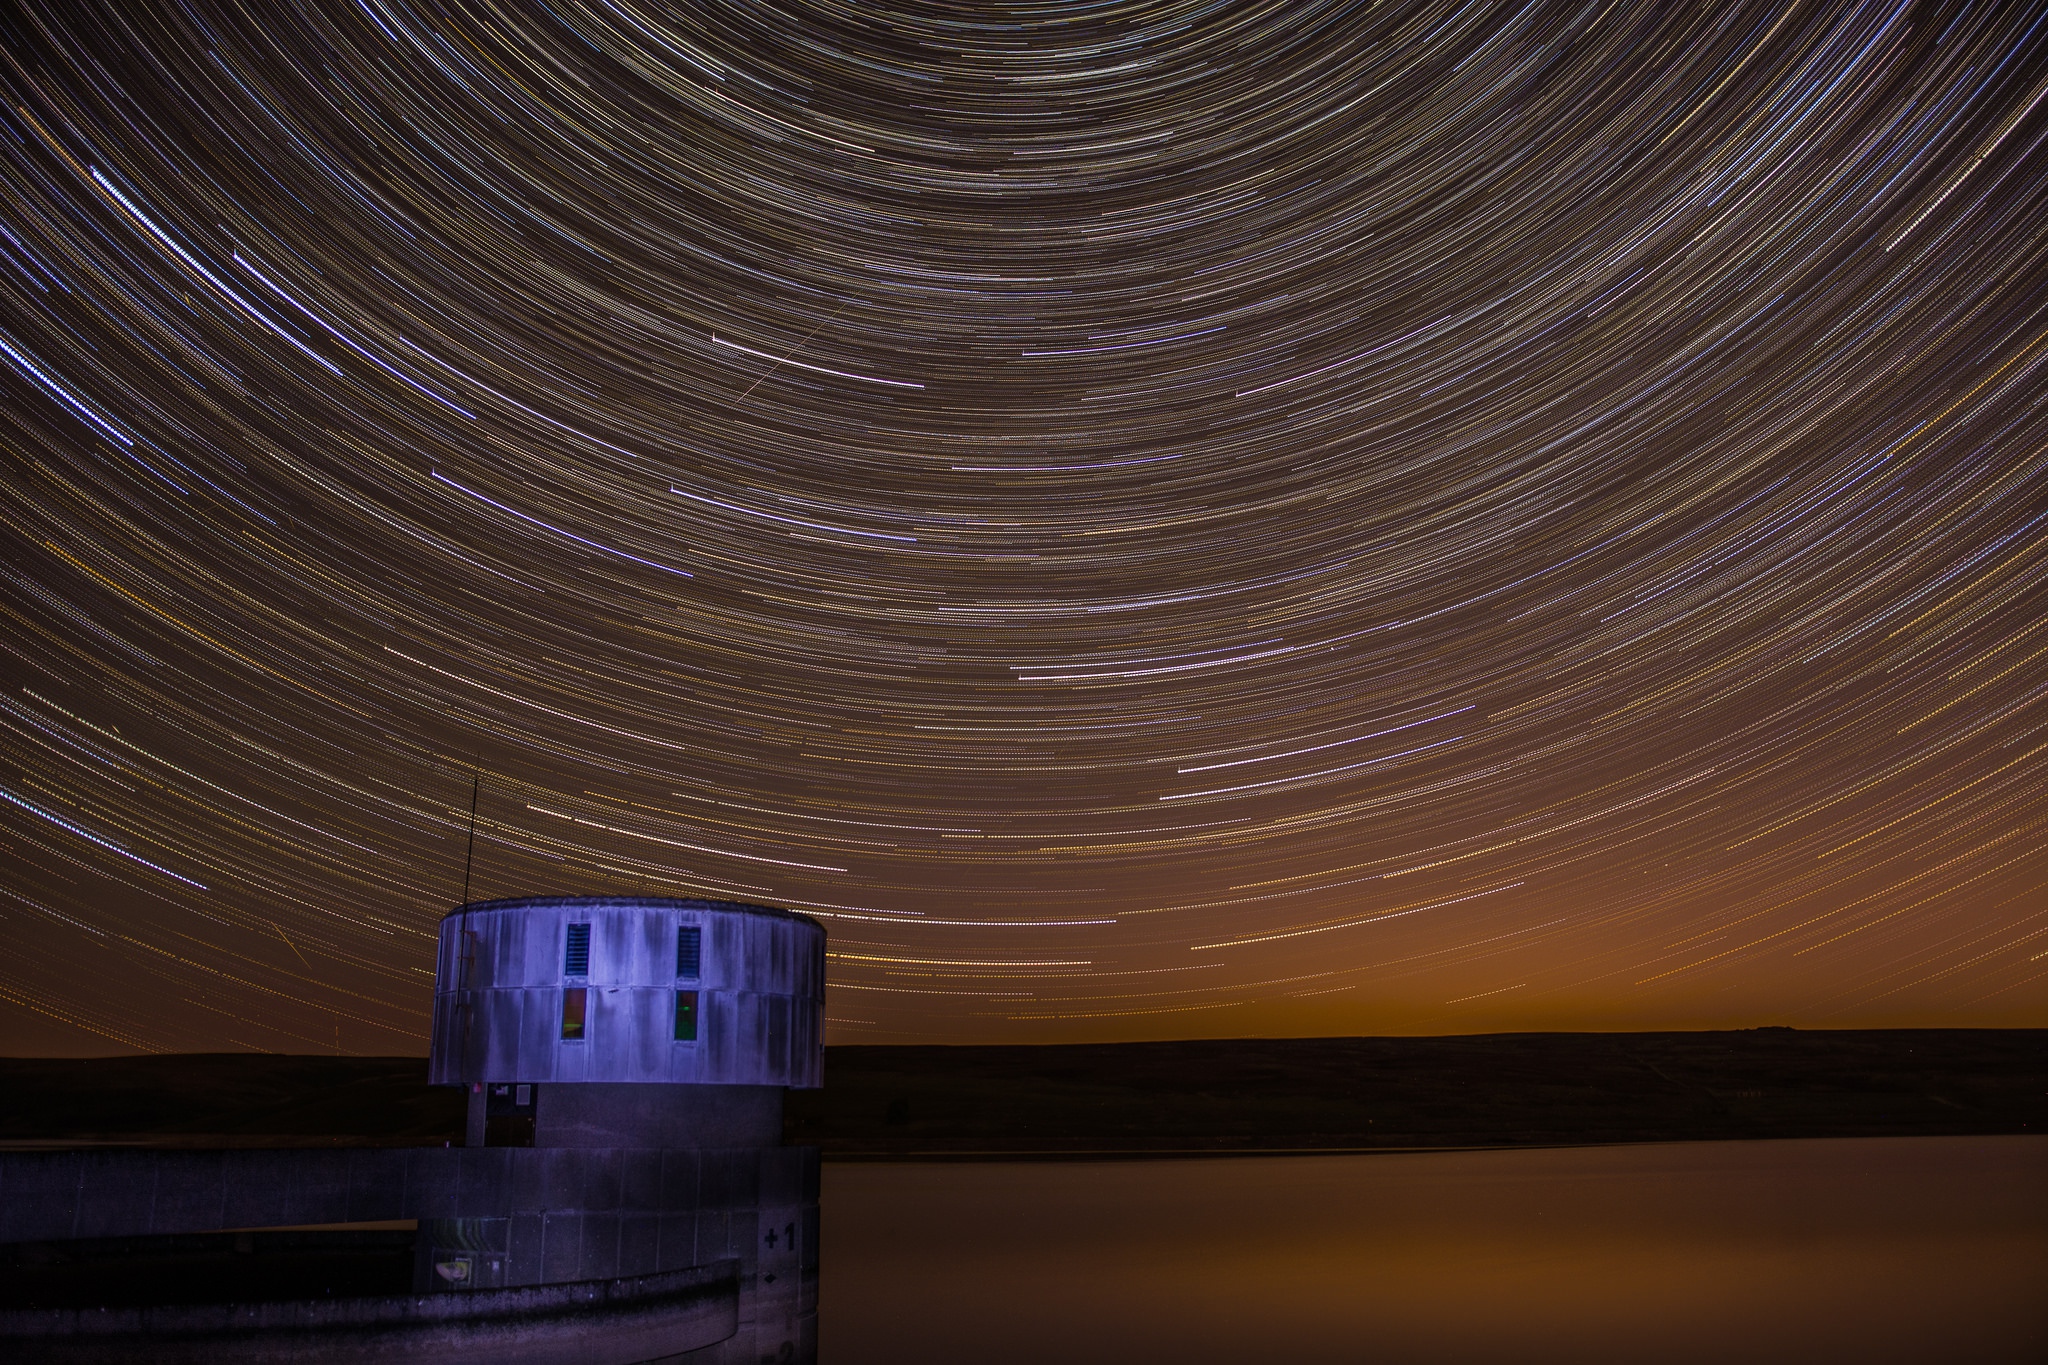
Grimwith Reservoir Star Trails during the Perseids Meteor Shower
I took two cameras with me. I had one set up in portrait with an 8mm Samyang fisheye mainly aiming at the sky with a bit of water in the bottom. My other camera was setup with my Sigma 18-35mm which was focused on the valve tower on the left. I used a pretty powerful LED torch to illuminate the tower so I could focus on it in the dark.
I had a bit of a dilemma; I wanted to to take some static shots of the sky so that the stars were sharp and I also wanted to create a photo with stacked exposures to create star trails. To take sharp images of stars ideally your shutter speed needs to be no more than 20-25 seconds long; this is because the Earth is moving so the stars appear to move across the sky. To create a good stair trail image you ideally want quite long exposures so they blend together well.
I opted to take a time-lapse with a very short gap between shots. This was to minimise the gaps when blending the images together. I used the built in intervalometer on my Nikon D7100 to take 25 second exposures and I left it running for a few hours. I had my aperture wide open at f/1.8 to let in as much light as possible. I stuck to an ISO of 500 as I didn't want to push the sensor too much. I find that the D7100 suffers from "hot pixels" if you take a lot of long exposures over ISO800. I also stuck some black electrical tape over the viewfinder as this helps block any light from behind entering into the camera.
We saw quite a lot of meteors but I think most of them were above or behind us. Nonetheless I manged to capture a few over the reservoir to create two decent shots. I really wanted to highlight the valve tower in the shot but there was no light to illuminate it, so I used my torch again to light paint it.
After a few hours I checked on my other camera and I noticed the lens had built up quite a bit of condensation. This is one thing to watch out for when shooting outside for long periods of time. I'm not the best person to explain why it happens but I think it's down to the lens being colder or equal to the dewpoint temperature. There's a good article on the-digital-picture.com which explains this.
Anyhow, when I got home at about 5am, I proceeded to import all of the RAW files into Adobe Lightroom. I then moved on into Photoshop to create the final stacked image. Without going into too much detail; you essentially import every single photo as a layer, and then you change the blend mode to 'lighten' which nicely blends all of the images together.
I also took one of the single photos which had a meteor trailing across the sky and processed it separately in Lightroom.
As soon as I processed my photos I sent the stair trails shot and the single meteor shot into the BBC and went to bed. I woke up later on to find that my photo had been featured on the BBC website!
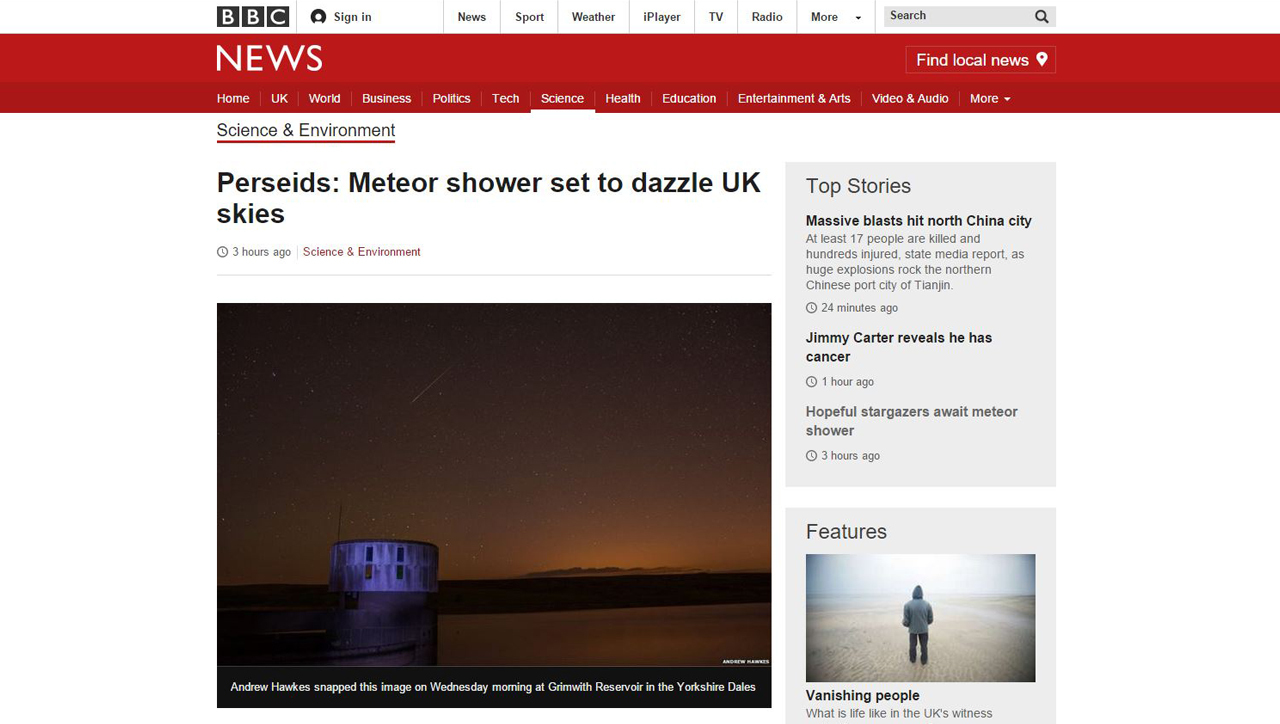
My photo featured on BBC News website
And later on both of them were shown on BBC News TV multiple times! So the long night of shooting paid off!
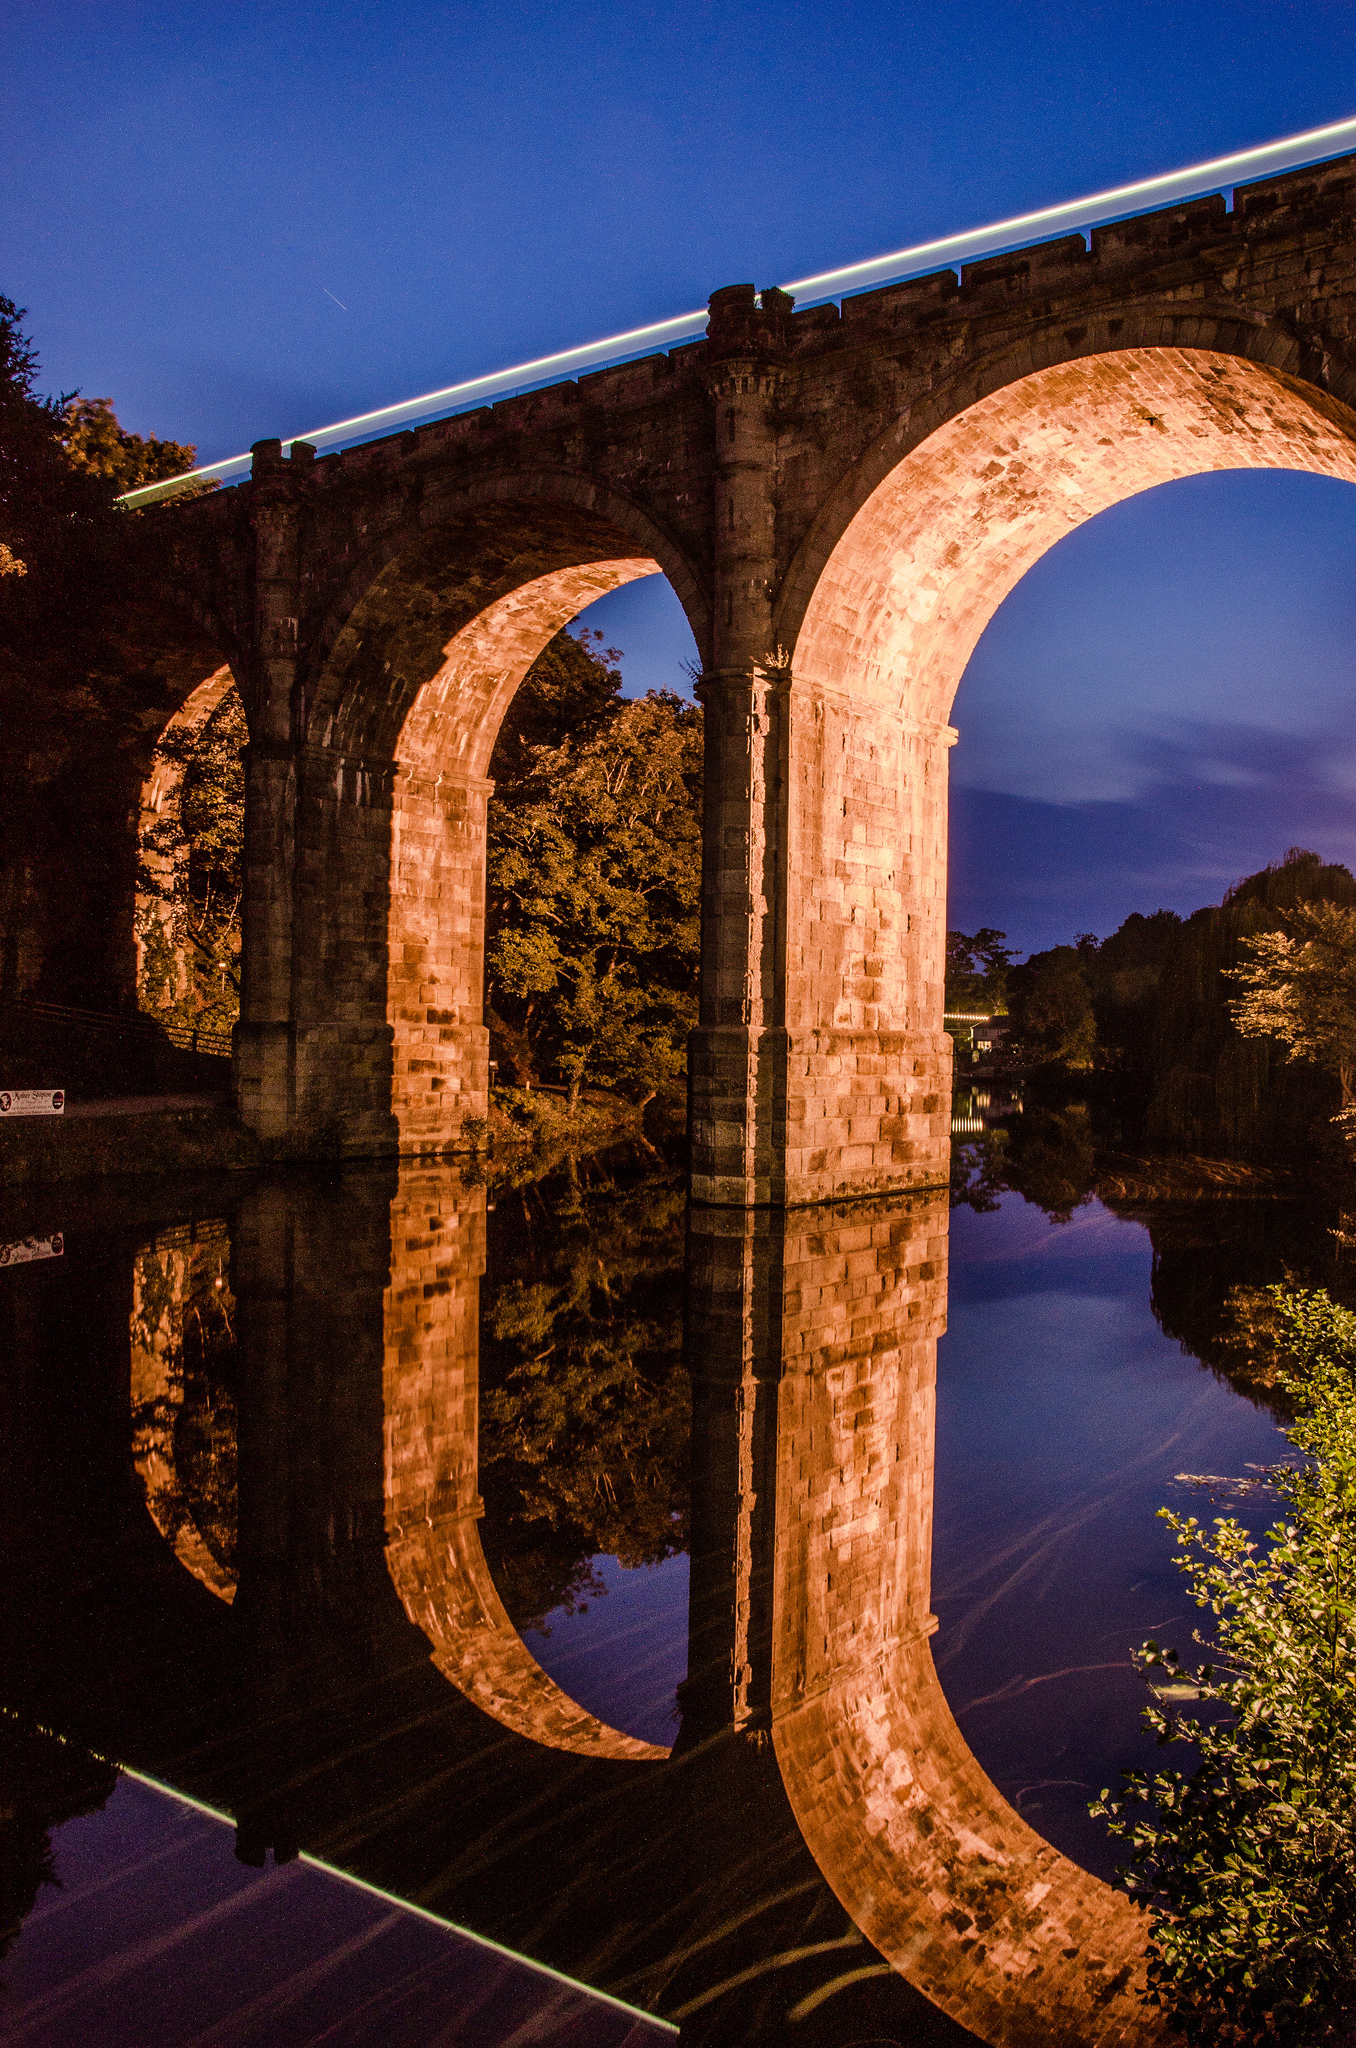
5. Leafy River Nidd - Knaresborough
I took this shot of the Viaduct in Knaresborough in 2013 and I really liked the effect that the leafs create when flowing through the water...
Knaresborough Viaduct Evening Shot
And in September 2015 I decided I wanted to attempt this shot again. I took the original shot in October so this time I went a little earlier as there are more leafs in the river at that time of year. I don't live very far from the river so I went down a couple of days prior to checkout the conditions.
When I arrived to take the shot the conditions were pretty much perfect. I knew what I wanted out of that shot so I purposely went down about an hour after sunset as I wanted the subtle blue light in the sky.
I used my trusty Sigma 18-35mm and D7100 combo on my tripod to take this shot. I focused on the viaduct and I used an aperture of f/8 to get front to back sharpness. I experimented with a few different shutter speeds using bulb mode on my camera with a wireless remote shutter release. I used an ND8 and an ND16 filter to allow me to expose for longer. I really wanted to exaggerate the movement of the water so I opted for an exposure which was around 200 seconds at ISO 100.
Luckily I also took a shorter 30 second exposure which I comped together with the 200 second exposure to create the final image...

The famous viaduct in Knaresborough with autumn leaves flowing downstream.
The reason I comped the two images together was because the 200 second exposure was perfect apart from the harsh highlights on the viaduct from the lights that illuminate it. The 30 second exposure had well exposed highlights so I merged the two. You might class this is cheating but it was the easiest way to get around the issue.
The only thing missing from this shot is the train which went over in the original. Maybe I'll try again in 2016.
Equipment I used
I use quite a lot of filters and lenses but here is a short list of some of the equipment I used for the shots in this post:
- Nikon D7100 DSLR Body
- Sigma 18-35mm F1.8 DC HSM Lens
- Hoya 72mm Pro-1 Digital ND16 Screw-in Filter
- Hoya 72mm Pro-1 Digital Circular Polarizing Filter
- Cokin P154 Neutral Grey ND8X Square Filter
- Cokin P121 Grad Grey G2 (ND8) Square Filter
- Wireless Camera Shutter Remote
- Cheap but amazing CREE LED Torch
Finally...
I took a lot of shots in 2015 but these were some of my favorites. Thank you for reading this post and please feel free to comment if you have any questions.
If you like my photography, please feel free to follow me on Flickr and Facebook.
Comments